Exams are time-barred assessments attached to a course. A Single Subject Course supports one exam; a Multiple Subject Course supports one exam per subject.
Steps
- Go to Evaluation → Exam and click + Exam.
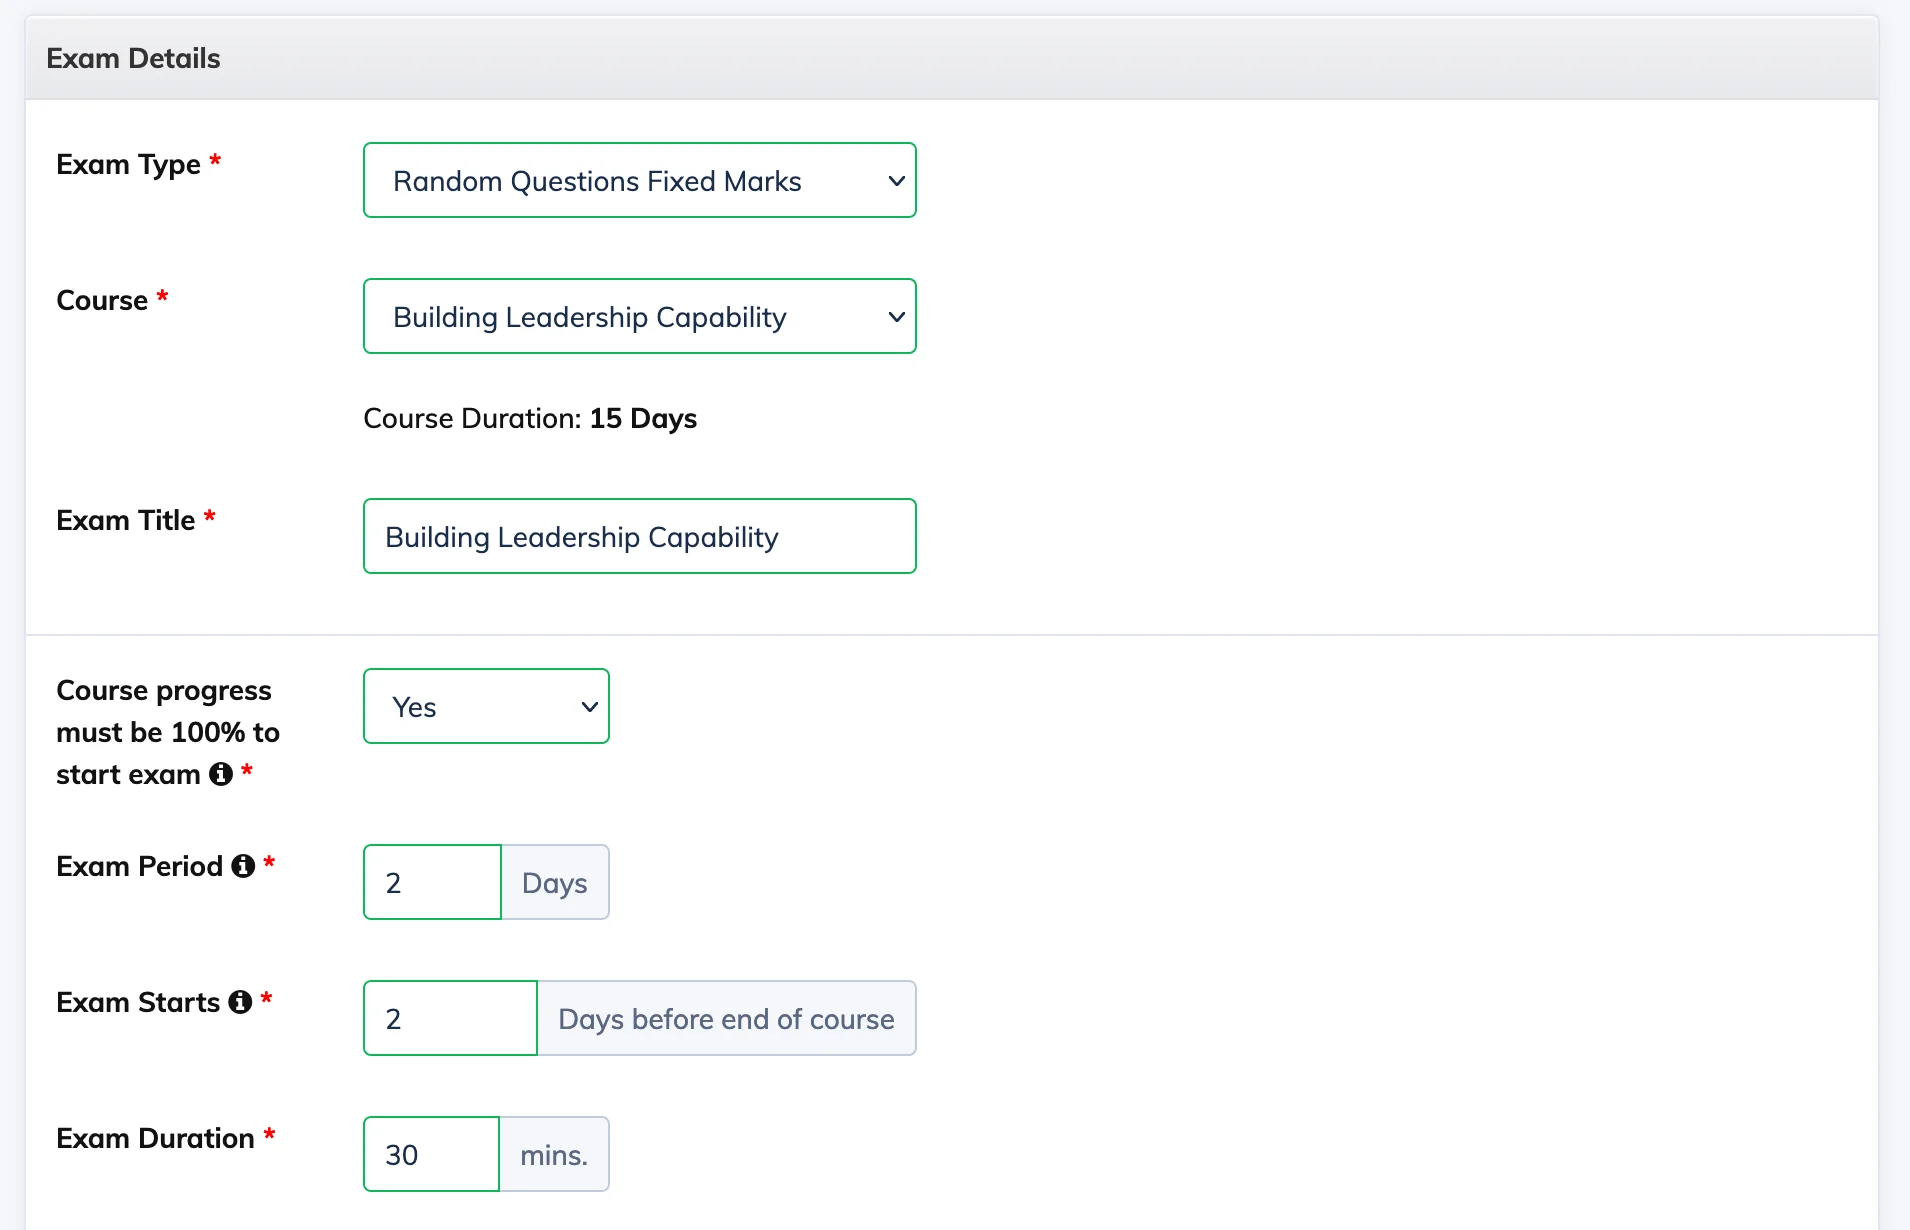
- Select the Exam Type and the Course the exam belongs to.
- Configure the exam settings:
- Course Progress Must Be 100% to Start Exam — When enabled, Trainees must complete all course content before attempting the exam.
- Exam Period — Number of days the exam is available.
- Exam Starts — Number of days before the course end date when the exam becomes available.
- Exam Duration — Time limit in minutes.
- Total Questions, Total Marks, Passing Marks — Set the exam structure.
- Configure security options if needed:
- Alert on Browser Minimize or Tab Change — Warns Trainees if they switch tabs or minimise the browser. Set Auto Submit Exam After to define how many alerts trigger automatic submission. See Browser Minimize / Tab Change Alert.
- Webcam Proctored Exam — Captures webcam images at set intervals. Set the alert interval for when a face is not detected and optionally auto-submit after a defined number of warnings.
- Click Create.
- Open the newly created exam and click Add Questions to build the question bank. See Add Questions to an Exam.
- Once questions are added, click Edit on the exam and change the status to Enabled.
Note: Newly created exams are in a disabled state by default. The exam link becomes available to Trainees only after it is enabled.
Additional Exam Options
- Send reminder emails to Trainees before the exam starts.
- Allow Trainees to reschedule if they fail.
- Allow Trainees to view their submitted answers after the exam.
- Automatically issue a certificate to Trainees who pass.